Modifying Original Recipes to Fit Your Needs!

A blog about healthy eating, healthy living and happiness. Join me and I'll show you how easy it is to substitute, modify and enhance your favorite recipes to accommodate your special diet, all without missing a thing!
Showing posts with label Fiber. Show all posts

December 16, 2012

Oat Free Quinoa Apricot Granola

I've come to a realization lately. Well, really more of a re-realization.

Granola, some sort of fruit be it fresh or dried, and yogurt, is a breakfast that I'm sort of... obsessed with. I guess it's really not that bad seeing as how granola can be made in a variety of ways, showcasing a multitude of flavors and textures all depending on the ingredients chosen. It's a healthy snack, a filling breakfast, something that may just become my everyday fall-back.

Anyway... during this re-realization I thought about the many people who are intolerant to oats... *gasp!* How sad it must be to go to your local grocer and not be able to pick up your weekly batch of granola, simply because, the sweet little oats don't act so sweet when settled in your belly. Naturally, I was just not okay with this fact. And thus... the oat free granola was born!


This recipe still follows closely to my many others, packed with nutrition and protein, a hint of sweetness and the perfect crunch to accompany your smooth and creamy yogurt of choice. The best part? It takes about 15 minutes to make, start to finish. I'm sensing you're ready for the recipe, am I right?

Oat Free Quinoa Apricot Granola
3/4 c quinoa flakes
1oz raw pumpkin seeds (just under 1/4c)
8 dried apricots (cut into small pieces)
1/4 tsp cinnamon
3/4 c Perky's Crunchy Flax Cereal

2 tbsp cashew butter (I used Artisana)
2 tbsp pure maple syrup
1/4 tsp vanilla

Preheat oven to 350. Line a small baking sheet with parchment paper, set aside. Combine quinoa flakes through cinnamon in a medium bowl. Slowly heat cashew butter, maple syrup and vanilla in a small saucepan until stirred to a smooth consistency. Add wet ingredients to the quinoa flake mixture, start the mixing with a spoon but you'll need to get dirty for this yummy granola, using your hands to finish off the mixing process. Place mixture in the oven for 6 minutes, remove and stir. Place back into the oven for 2-3 more minutes (at this point the granola should be golden and slightly brown at the edges). Remove from oven and add in the Crunchy Flax Cereal. Let granola cool, place into a mason jar and store on the counter.

Enjoy this oat free granola over yogurt, with a banana and almond milk for a delicious non-traditional cereal treat, or munch for a portable snack any time of day. It's delicious, it's oat free, and it's packed with good for you nutrients!

Let's take a look at the nutrition facts, shall we?

Per 1/2 cup serving
217cal
34g carbs
4g fiber
6g protein
10g sugar

Eat up and enjoy, and maybe keep a secret stash away from the public eye of your kitchen... it just may disappear faster than you'd like!


August 13, 2012

Classic Morning Granola

Today my friends... I have the day off. Yup, it's Monday morning, 8:00am and I'm still in my sweats, eating the wonderous granola I'm about to share with you, and planning out my day.

Lovely, isn't it?

Although I don't have to work today, I still woke up early.. 6:30am in fact. My better half leaves the house at 6:00am to head downtown for work. Needless to say.. we go to bed early. It doesn't bother me at all however, because I'm a non-traditional 22 year-old and actually enjoy starting my days off early to pack in all that I can.

So, you're probably wondering what all this has to do with this granola recipe? Well here goes...

I woke up, starving as usual, trying to figure out what I wanted for breakfast. Usually I have all of this planned out for my work days, but since today is different, I let it slide ;-) Another thing you should know, I am extremely indecisive, especially when it comes to food. This is about how my thoughts went while aimlessly wandering around the kitchen....

Banana muffin in the freezer? 

Nah... maybe for tomorrow. 

Soy yogurt? 

Eh.. had yogurt yesterday morning. 

Cereal?

Hmm... getting close...

Granola?

YES!

The problem was... I didn't have any granola made. Well, I can certainly fix that. I thought, I'll just whip up a quick batch. And so... that's exactly what I did.

Classic Morning Granola
1/3 c apple juice
2 tbsp safflower oil
1 tbsp honey
1 tbsp grade A maple syrup

1 c gluten free rolled oats
1 c walnuts (chopped)
6-8 brazil nuts (chopped)
1/4 c pumpkin seeds (raw or roasted is fine)
3 tbsp ground flaxseed
1 tsp cinnamon

Preheat oven to 350 degrees. Combine the wet ingredients in a large skillet, heat to combine. Add all dry ingredients to skillet, stir until fully mixed. Line a large baking sheet with a silpat or parchment paper and add granola to sheet. Bake for 5 minutes, remove and stir (continue this pattern twice more - a total cooking time of 15 minutes.) Finally, set to broil for 2-3 more minutes (watch carefully, I was about 20 seconds away from burning the whole batch - once it starts to brown, it does so very quickly!) Remove from oven, let cool and start munching.

Store on the counter in a large mason jar or any air tight container.


The beauty that arises from a day off... you can wake up, take the time to make a magnificent breakfast, and share it for all to enjoy.

Last but not least... here are the healthy facts

Per 1/3 cup serving
278 calories
18g carbohydrates
5g fiber
7g protein
6g sugar

Oh, and in case you were wondering... my breakfast turned out to be a delicious granola breakfast bowl.
Step 1: half banana cut into pieces

Step 2: add deliciously fresh, ripe blueberries

Step 3: top it all with my classic morning granola and a touch of rice milk

Perfection. Breakfast at it's finest.


March 31, 2012

Blackberry Oat Flour Bake

So.... I think I've discovered a new breakfast to add to my repertoire.

Oat bakes.

If you don't remember last Saturday's post, here's a quick refresher... I had seriously been craving a big, fluffy, bad-for-you kind of cinnamon roll. But of course, dietary restrictions stopped that dream and I instead came across this recipe for a, shall we say, stand in cinnamon roll? I made it, it was delicious, pure Cinnamon Raisin Oat Bake Goodness.

Okay. Now that you're refreshed... back to the amazing addition to my weekly breakfast rotation ;-)

After the successful outcome of last Saturday - perfect breakfast, fueled with energy and a happy 6 mile run... I began to think.. Saturdays might just be the new oat bake day. Doesn't sound so bad, right?

Hence... my newest creation... a Blackberry Oat Flour Bake.

So simple, so healthy, so... yummmmmm.

I love showing you the final product before giving the ingredients and cooking instructions... just a little teaser to get you sucked in ;-)

Here is what you'll need...

1/3 c oat flour (or grind your own from gluten free oats - just not the instant kind)
1/4 tsp baking powder
1 tbsp ground flaxseed
1/4 tsp cinnamon

1/2 banana very mashed
3 tbsp vanilla hemp milk
1/4 tsp vanilla

4-6 fresh blackberries cut in half + some for topping (~1/2 c total)


Preheat your oven to 350. Combine the dry ingredients and mix well. Combine the wet ingredients, really mash your banana - you want it almost liquid like. Combine the wet and dry ingredients until fully mixed. Fold in your blackberries. Grease a mini bread loaf pan or a small oven-safe dish (4-5 inches wide), scoop the batter into your prepared pan and bake for 16-18 minutes. (I checked mine at 16 and the toothpick was almost clean but I still ended up cooking the full 18 minutes.) If eating immediately let cool slightly before adding your toppings (you don't want to burn your taste buds and ruin the enjoyment of this amazing breakfast!) If eating the next morning, let fully cool and wrap in plastic wrap, store in the refrigerator over night. Heat for 45 seconds in the microwave, add the toppings you wish and enjoy.

Now, let's talk toppings..

I was planning on using the other half of my banana as a topping but when I realized how dense this bake was, I didn't think my stomach could handle it. I chose instead to top my bake with a drizzle of honey, a few more blackberries (halved), a few broken-up banana chips and a sprinkling of dairy free chocolate chips. Oh yes. If you're drooling right now it's okay... I am too and I already enjoyed this masterpiece.

I know you are ready to make this... perhaps you will have an Oat Bake Sunday. But just in case you need a little more of a push.. here is a rough estimate of the nutrition facts (I know you love them.)

Per One Blackberry Oat Flour Bake 
400 calories  
65g carbohydrates  
13g fiber
12g protein


Don't forget your morning paper and your smooth breakfast blend coffee... 
and please... 
enjoy responsibly.

March 24, 2012

Cinnamon Raisin Oat Bake Goodness

Let me set this up properly--

I am a senior at the University of Colorado, majoring in Marketing in the Business School.

I am graduating on May 10th, exactly 47 days from today.

Today is the first day of the last Spring Break I will ever have.

WHAT?!?!? This is unreal.

So... what better way to start this day than with a mouth-watering, stick-to-your-gut breakfast, paired with coffee of course ;-)

I've had a massive craving for cinnamon rolls lately. You know the kind they sell at Cinnabon? The larger-than-life, should-be-split-between-four-people, loaded-with-fat cinnamon roll? Oh yes. Now you know what I'm talking about. While there are plenty of gluten and dairy free recipes out there for cinnamon rolls, they all still contain yeast. Bummer. I'm determined to somehow create a gluten/dairy/yeast free cinnabon copy-cat, but until I find the time (most likely after graduation) I've been searching for a stand-in. I found this recipe for Cinnamon Roll Baked Oatmeal from Chocolate-Covered Katie and thought... this just might do it!

I've made buckwheat bakes several times and have never been disappointed so I was more than willing to give an oatmeal bake a try.

The outcome??


Delight. Smile on my face. Was literally scraping the chocolate off of my plate. Yes.


As you've noticed the last few of my recipes have not been my own creations. Why? Because there are so many talented people out there making the most amazing looking foods... how can I not make their recipes?!

That being said, I followed this recipe [almost] to the tee. I strongly encourage you to visit Chocolate-Covered Katie, she has incredible recipes! But, here my dear is the recipe with my minor tweaks.

Cinnamon Raisin Oat Bake Goodness
1/4 cup steel cut gluten free oats + 1/4 cup oat flour (you can grind your own)
1/2 tsp cinnamon
1/4 tsp vanilla extract
1/4 cup unsweetened applesauce
1/4 cup vanilla hemp milk (using a flavored milk eliminates the need for added sweeteners)
a dash of salt (careful not to overdo it! I really mean "a dash"!)
1 tsp melted butter
a handful of raisins
small handful (or more) dairy free chocolate chips

Preheat oven to 350. Use a coffee grinder, grind 1/4 cup oats into a flour. Add to bowl along with the remaining whole oats, cinnamon and [dash] of salt. Mix hemp milk, applesauce, vanilla and butter and add to dry ingredients. Stir until fully mixed. Add raisins and chocolate chips, stir again until fully mixed. Lightly grease a 4-inch oven-safe dish or 2 ramekins and add oat mixture. Place in oven for 15ish minutes (you just don't want it to still feel mushy). If eating immediately turn broiler on high and let your oat bake get a nice crunchy top for about 5 minutes. If eating the next morning, let your bake cool, wrap in plastic wrap or foil and store in the fridge overnight. When ready to eat microwave bake for 30 seconds and then place under broiler for 5-7 minutes.

I topped my oat bake with a small mixture of cashew butter, melted butter (oh come on.. it's supposed to replicate a cinnabon, remember?!) and a dash more of cinnamon. I smothered this over my bake along with half of a banana (sliced) and oh my.... breakfast heaven.

While I do still have a yearning for that soft yet crunchy, completely sinful cinnabon-like cinnamon roll, I will say that this oatmeal bake did quite the job at suppressing that craving for now. Not to mention, as I was eating it ideas were overflowing in my head of other oat bake variations I could make!

This is a great breakfast to enjoy on the weekend when you have all the time in the world to drink your coffee and read the morning paper, however, it stays together extremely well and I'm sure could be taken for an on-the-go breakfast (if you must).

Thank you Katie for this great recipe! 


Now go on.... get baking ;-)

February 26, 2012

Savory Crayon Muffins

"Crayon Muffins"? Really?

Yes. Really. Let me explain.

While cooling on the wire rack, my boyfriend stopped to take a look. His reaction? "It looks like you melted crayons in your muffins." HA! Priceless. I love you honey.


Now that the ever-so-enticing name is given a reason, let's move on to this wonderful recipe that worked out (for the most part) on the very first try. (p.s. I love it when this happens!)

The inspiration for these muffins came from my Basic Buckwheat Bake all spruced up! Well, no. I can't take the credit. The credit should be given to The Healthful Pursuit and The Edible Perspective - both of which inspired the buckwheat bake. You see, after having the bake a few times for breakfast and absolutely loving how satisfied and full it left me (not to mention how people in my class were gawking at the rest of this delicious breakfast that I took to my 9:30am class), I was inspired to create a savory version that I could take along for lunch.

I found some gluten free, nitrate free chopped prosciutto at King Soopers and thought it would be a perfect addition to my not-yet-created savory muffins, complete with protein and flavor. Great - 1 addition purchased.

A few days later I was at Sunflower Market and while strolling through the aisles I found the on-sale baby food. Yes. Baby food. What a great way to substitute the banana from the buckwheat bake... pureed veggies that are already pureed! Also on this shopping trip I bought a large jar of on-sale roasted red peppers (yum!). Score - 2 more additions.

After several days of thinking and conjuring up how I would make these muffins work... and also after carefully trying to [somewhat] replicate the buckwheat bake recipe in order to avoid a complete failure, I came up with these bad boys...Savory Crayon Muffins.


Dry Ingredients
1/4 c amaranth flour
1/4 c sorghum flour
1 tbsp ground flaxseed
1/2 tsp baking powder
1/2 tsp garlic powder
1/2 tsp dried rosemary
1/2 tsp sea salt
1/2 tsp black pepper
2 tbsp pine nuts
2 tbsp sunflower seeds

Wet Ingredients
Egg Replacer*
1/4 c carrot baby food**
2 tbsp water

Add-Ins
2 tbsp roasted red peppers (diced)
1.5 oz chopped prosciutto

Preheat oven to 350 degrees.
Combine all dry ingredients in a medium sized bowl. Make egg replacer, whisking until frothy and add to dry ingredients. Add baby food and water, mix until combined. Add in prosciutto and roasted red pepper, stir again until combined - the batter will be thick. Spray (or grease) 3 ramekins, making sure to coat the bottom and sides. Divide batter among the ramekins and use the back of a wet spoon to smooth out the tops. Bake for 30 - 35 minutes.***


Notes
*I used Ener-G Egg Replacer. You can also use 1 egg - this will probably cause the muffins to rise more. You can also use a flax or chia egg.

**I used carrot baby food, it gave a beautiful orange-golden color to my muffins but feel free to use any vegetable flavor combo you like!

***I continually opened the oven to check these which is probably why my muffins came out to be a little mushy in the middle. I suggest keeping your oven closed the full 30 minutes and then checking with a toothpick. The tops will be cracked and have a crusty feel but if the toothpick isn't clean, continue cooking for a few more minutes.


Although I have only sampled a few bites, I am instantly a fan and will be sure to create many versions of these muffins, using different add-ins and flavor combinations. I am thinking these will be better warm than cold. My suggestion for lunch - heat your muffin in the microwave for 30 seconds (or pop into a toaster oven) and enjoy with a crunchy apple, a small salad or perhaps... soup?

Lastly, let me share with you the nutrition facts because, well, I am just that considerate ;-)

Per 1 Savory Crayon Muffin
178 calories
21g carbohydrates
3g fiber
5g protein


PLEASE leave any comments or feedback for flavor suggestions [and] when you make these yourself be sure to come back and let me know how they turned out!

February 8, 2012

Basic Buckwheat Bake all spruced up!

This. Was. Fabulous.

I had been meaning to make a "bake" like this for sometime now, with inspiration coming from the Healthful Persuit and The Edible Perspective. Each of these wonderful women have similar recipes but for my first attempt I went with the most basic version from The Edible Perspective. (I've mentioned this before but both of these sites have fabulous recipes as well as photography, you must check them out!)

I followed this recipe (almost) to the tee, making only a few changes...

  • one egg white instead of the flax egg
  • a handful of pecans rather than walnuts
  • 4T vanilla hemp milk vs. almond milk
  • I added 1 tsp of maple syrup to the batter just before baking
Once your bake is done, the possibilities are endless when it comes to toppings. Personally, I chose sunbutter, fresh blueberries, dairy free chocolate chips and a hint of honey. Pair with a delightful cup of coffee and I'm in heaven!


I've already come to the conclusion that this is now in my weekly breakfast rotation and I have so many thoughts for variation in this recipe! I'm thinking... blueberries and chocolate chips baked right into it.... a savory version with veggies and perhaps bacon?! Oh the list goes on and on :) Be sure to look for my variations on this delicious, nutritious and perfectly filling breakfast coming soon!

Enjoy!

January 22, 2012

Divine Chia Breakfast Pudding

Happy Birthday! Since today is my golden birthday... turning 22 on the 22nd day of January in the year of 2012... it seemed appropriate to give you a gift today. That's right... I'm giving you two recipes in this post. Yeah, it's happening.

I have seen several recipes for some variation of chia pudding, but the true inspiration came from Leanne over at the Healthful Persuit. I've mentioned her blog before and have recreated a few of her incredible recipes... that just goes to show that when you have an amazing blog, inspiring recipes and the most beautiful photography - you will get repeat visitors ;-)

I've long known the benefits of chia seeds and decided that eating them more frequently might help with my digestive issues. While I'm back in school for my final semester (yessss!), it has been a challenge to remember to add chia to my food on a daily basis, which is why incorporating a full serving at breakfast is the perfect way to go!

Okay... enough babble? Here are the two recipes as promised...

Banana Almond Chia Breakfast Pudding
1 banana
1/4 c vanilla almond milk (or use plain if you prefer)
1 tbsp chia seeds
1 tbsp sunbutter

optional toppings:
fresh blueberries
granola
cinnamon
dried fruit
nuts

*Prepare the night before you plan on eating.
In a small bowl, mash half the banana (reserve the other half for the morning, store in the refrigerator overnight). Add the almond milk, chia and sunbutter and mix until combined. Cover with plastic wrap and place in the fridge overnight. The next morning, slice the other half of the banana on top of your pudding, add some fresh blueberries and a few dashes of cinnamon. Enjoy cold or briefly heat in the microwave.


Chocolate Banana Chia Breakfast Pudding
1 banana
1/4 c chocolate soymilk (Silk is my go-to brand)
1 tbsp chia seeds
1 tbsp cashew butter


optional toppings:
fresh berries
cinnamon
dried fruit
nuts

*Prepare the night before you plan on eating.
In a small bowl, mash half the banana (reserve the other half for the morning, store in the refrigerator overnight). Add the soymilk, chia seeds and cashew butter and mix until combined. Cover with plastic wrap and place in the fridge overnight. The next morning, slice the other half of the banana on top of your pudding, add your other toppings of choice and enjoy! (I added dried cherries, cinnamon and a bit of flax cereal - delish!) This was delightful cold but feel free to heat briefly in the microwave if you are more of a warm breakfast person.


I hope you enjoy these two variations and please have fun creating your own versions! My next upcoming pudding will be made with vanilla hemp milk and perhaps a mix of nut butters.. keep checking back for that recipe ;-)

January 4, 2012

Crunchy Pure Granola

I must admit I am quite proud of myself for this one... I looked at a few past granola recipes I had made in my pre "free-diet" life and came up with this one on the spot. And ya know what? It's delicious!

My roommate even commented, "Did you make that?" Why yes I did. "It looks like something from like a... kit or... like you bought it in a store." Aw, thanks Nick! ;-)

I'm going to give you a brief warning that this is the approximate recipe... I didn't really measure but somehow the recipe turned out great. That just goes to show you can't really mess this up, so give it a try!

Ingredients
3/4 c chopped walnuts
1/2 c chopped cashews
1/3 c gluten free oats
1/4 c pumpkin seeds (pepitas)
1 - 2 tbsp flax seed
1 tsp cinnamon
1/4 c crunchy flax cereal

1/4 c applesauce
2 tbsp maple syrup (or agave nectar)
1 tbsp walnut oil (any oil will work)


To Prepare
Preheat oven to 325 degrees. Line a baking sheet with parchment paper and set aside. Mix the nuts, oats, pumpkin seeds, flaxseed and cinnamon in a bowl. Heat the applesauce, maple syrup and oil in a small pan until well incorporated. Add the applesauce mix to the dry ingredients and stir until all ingredients are coated. Spread onto the baking sheet and bake for about 10 minutes. Remove from oven, stir the granola and continue baking for 5 more minutes. Add the crunchy flax cereal to the granola, stir, and continue baking for 3 minutes. (These time estimates are rough... each time you take out the granola take a small sample to test the crunch factor. If you like your granola very crunchy you may end up baking for longer, but be sure to add the extra time before you add the crunchy flax cereal, as it will burn if baked for too long. Also, keep in mind that as the granola cools it will get more crunchy.) Let granola fully cool on the baking sheet and store in a glass jar or air tight container. Enjoy as a snack on the go, or my favorite, top soy yogurt with berries, granola and banana chips - the ultimate breakfast parfait!


December 16, 2011

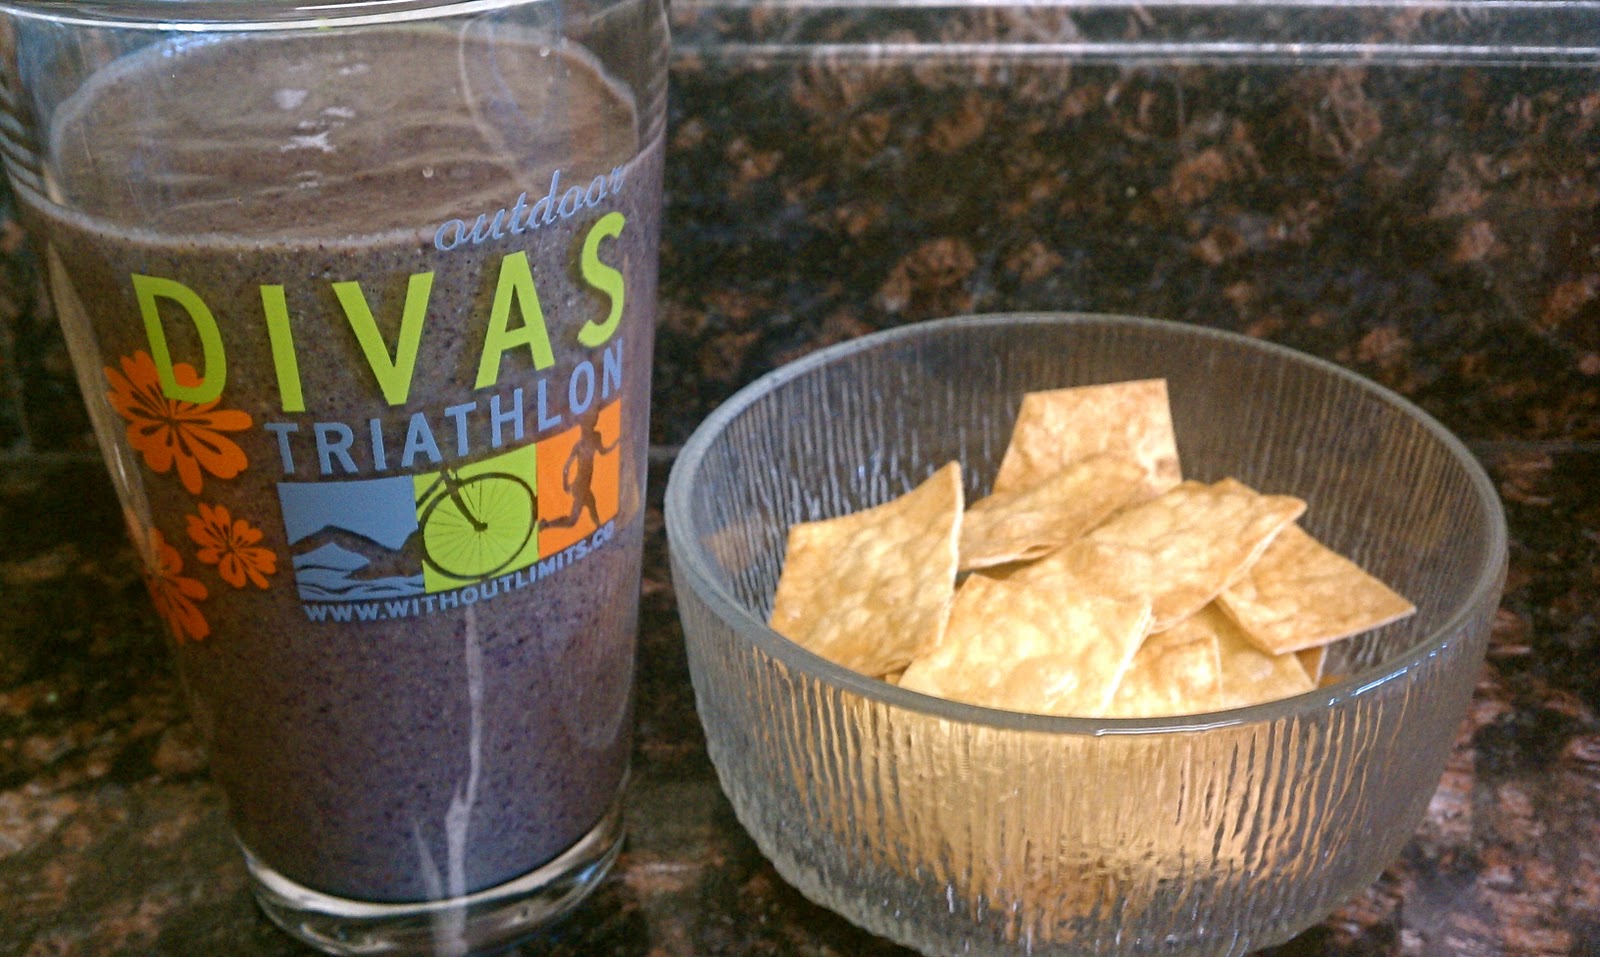
Protein Packed Purple Smoothie

The idea for this smoothie came about this morning, knowing I needed a healthy protein packed snack after my mid morning cardio workout. I usually have to plan what my post-workout snacks are going to be ahead of time because after my cardio sessions, nothing sounds all that delicious. I have also found that planning or at least thinking about what you'll refuel with ahead of time leaves you feeling better during and after you've eaten the snack.

Here's what you'll need for this protein packed snack:
1 tbsp chia seed
1 c vanilla hemp milk
1/2 frozen ripe banana 
1 c greens (I used romaine lettuce)
3/4 c frozen blueberries
3 tbsp hemp protein powder

For this smoothie, you'll need to do just a bit of prep work, but it will be well worth it in the end! Are you ready?

Mix the chia seed and 1/3 c hemp milk in a bowl. Place in the fridge. (Yup, that's it!)
I let mine sit for about 2 hours, you don't need to wait this long but make sure to let it sit at least 15 minutes so that the chia begins to form a gel. It works great to throw this together before your workout, put it in the fridge, and it will be ready when you get home!

To Prepare the Smoothie
When you get home and are ready to make the smoothie, throw the chia gel and the rest of the ingredients (including the remaining 2/3 c hemp milk) into the blender and mix until smooth. The consistency of this smoothie is pretty thick (I actually ate mine with a spoon!). If you aren't a fan of super thick smoothies add extra hemp milk, juice or water until you reach the thickness you like. 

Now, to please those of you who always like to know the nutrition info on what you are eating, and because I'm claiming this smoothie as being "protein packed", I thought I'd break it down for you.

Protein:
Hemp milk - 3g
Chia seed - 3 g
Hemp protein powder - 11g
----------------------------------
Total Protein = 17 grams

Fiber:
Chia seed - 5g
Blueberries - 4g
1/2 Banana - 2g
--------------------------------
Total Fiber = 12 grams

Go ahead and cheer... I already know you are ;-)


To break it down even further... my workout consisted of a 20 minute cardio challenge on the stationary bike followed by 15 minutes of inclined running on the treadmill followed by a 5 minute cool-down walk. With a total of 40 minutes of cardio and 17 grams of protein in this smoothie... that means I got just about 2 grams of protein for every 3 minutes I worked out. How's that for a post workout snack?? 

Protein up and enjoy!

December 8, 2011

Nutritional Powerhouse Bites

These are truly the most amazing little "bites" you'll ever have! They are so simple to make, very versatile and can be made with almost any dried fruit mix you have on hand, and can have as many additions as you want! So what are they to be such a "powerhouse"?

Nutritional Powerhouse Bites
14 dried figs
10 dried apricots
1/4 c walnuts
1 tbsp chia seed
1 tbsp sunbutter (or any nut butter you have on hand)
1 - 2 tbsp dairy free chocolate chips (or chop up some dark chocolate for even more superfood power!)
a touch of water as needed

Place all ingredients in your food processor. Pulse until all ingredients are fairly chopped and mixed together. Take off the lid and check the consistency... you want it to be pulling away from the sides, and able to stick together if you pick some up with your fingers. If it's not quite there add 1/2 tbsp water at a time until you get to the right "sticky-point". Use a spoon to take out about 1-2 tbsp of the mix and form a ball in your hand, they should be just smaller than a golf ball - using this approximate size I came out with 10 balls. Put the balls into an air-tight container or a plate covered with plastic wrap and keep in the refrigerator (they will hold together better this way).
*I couldn't wait for them to cool, I had one... and then another one right after making them ;-)*


Suggestions for Additions/Substitutions
*Any nut would be great in place of or in addition to the walnuts.
*Dried figs are a great base because they are naturally sticky, but any dried fruit (or mix of fruit) would pair beautifully! ...Mango, pineapple, cranberries, blueberries... the options are endless!
*Any nut butter can be used in place of the Sunbutter, you might also give mashed banana or pumpkin a try!
*I love the chia seed because it is so great for the body but it is a bit expensive. Substituting flaxseed would keep those Omega-3s, fiber and protein benefits and still provide many vitamins and minerals.
*If you want to add even more of a boost you could add other seeds like sunflower or pumpkin. And if you are feeling adventurous add some protein powder - though I would stick with only 1 tbsp and would add an equal amount of a "wet" ingredient (i.e. nut butter, banana, juice may even work!)


Now that you know how to make them, do it... now! You won't regret it, I promise! Then once you have made them you can come back here and read about how much your body will appreciate you for eating these delicious and nutritious little bites.

Can these really be called nutritional powerhouse bites?
YES! And here is why...

Figs: A great source of fiber and B vitamins, calcium, potassium, iron, manganese, selenium, copper, and zinc. B vitamins help metabolize carbs, proteins & fats. Calcium is great for our bones, potassium helps to regulate blood pressure and heart function, iron is a mineral that almost everyone is deficient in so you can never get enough!


Apricots: Another good source of fiber, full of vitamin A which helps with vision and combats free radical damage, and because of their rich color they are a great source of beta carotene.


Walnuts: A great source of protein, healthy Omega-3s and vitamin E. Walnuts have continued to move higher on the ladder of antioxidant and anti-inflammatory benefits which help to protect against metabolic syndrome, cardiovascular problems and type 2 diabetes. Whew!


Chia Seed: Chia is the new craze! It is a great source of fiber and protein, has high amounts of Omega-3s, contains antioxidants, B vitamins and minerals, and not to mention is gluten free! They are easily digested, have been shown to increase energy, aid metabolism, and help with regularity. *Chia seeds are also great for athletes as they can prolong hydration and help our bodies to retain electrolytes. (For more info and recipe ideas click here!)


Sunbutter: Another great source of protein and an alternative to peanut butter. It contains 27% of your daily allowance of vitamin E, and is also high in iron and fiber.


Chocolate Chips: Good for the soul! If you use dark chocolate, you are really getting that superfood power as dark chocolate is packed full of antioxidants and has also been shown to lower blood pressure.

Convinced?? I thought so! Now go make these (or whatever version you would like) and eat them guiltlessly as a snack, dessert or as a delightful addition to any meal!

October 9, 2011

Revamped Morning Cereal

This breakfast is so simple but it is so delicious, filling, and oh so healthy! Some mornings you just feel like cereal... it is comforting and something that almost never upsets your stomach. This mixture of cereal can be varied, using any berries or fruit you have on hand and using any non-dairy milk (or if you can tolerate dairy, regular milk!) Personally, I think the combination of tart raspberries, sweet dried mango and creamy vanilla hemp milk is the perfect match - but feel free to experiment!

The cereal I eat 99% of the time is Enjoy Life Crunchy Flax Cereal. It is filled with fiber and protein, has a great crunch and actually stays with me until lunch time!

Top this with fresh raspberries and chopped dried mango (any dried fruit you have will also work), and add  your preferred amount of Pacific Foods Vanilla Hemp Milk. Enjoy with a large cup of green tea and your morning will be transformed! Okay maybe that is a little dramatic but.... it is a great way to start any day :-)

September 13, 2011

Tuna Cakes & Sauteed Spinach

This recipe comes from The Allergy Self Help Cookbook . I bought this cookbook online when I found out that my summer would be spent eliminating the 23 foods I tested as being reactive to. The recipes in this book are free of all common food allergens (corn, gluten, egg, sugar, wheat, milk, soy, yeast). I saw the book in Barnes & Noble and was thrilled!

It gives a great deal of hope for those who are just starting on their allergy-free journey. I will say one thing - if you are new to gluten-free flours and the tastes, just keep an open mind with some of these recipes! Before you know it you will love these natural, earthy flavors and your body will be much happier as well.

The recipe for these Tuna Cakes, or Tuna Burgers as called in the book, are as follows:
1 can (6 oz) no-salt added water-packed tuna, drained
1/4 c. minced onions
2 tbsp honey-sweetened or fruit sweetened ketchup (I used Annie's)
1 tbsp prepared mustard (I used Dijon)
2 tbsp mayonnaise (or vegenaise) 
2 tbsp minced parsley or cilantro (optional)
1/4 - 1/2 tsp salt
1 starch: 1 small cooked white potato OR 1/4 c. toasted amaranth flakes OR 1/3 c. quinoa flakes OR 1/4 c. oat bran
1 - 1 1/2 tbsp vegetable oil (canola is fine)


To Prepare:
Combine all ingredients except oil in a food processor, process for 10 to 20 seconds or until well mixed (you'll need to stop halfway to scrap the sides into the middle).
Heat the oil in a large skillet over medium-low heat. Shape mixture into 4 very small tuna cakes or 3 normal sized cakes and place on pan. (The book says to drop the mixture onto the pan and flatten with a spatula, but my method worked perfectly and I think held the cakes together better.) They will cook about 5 minutes per side, or less if your pan is hotter - you'll know when to flip them when the sides begin to turn golden.

*Note: The recipe says "serves 4" but it was just enough for the 3 tuna cakes. If you want leftovers I would suggest doubling the recipe. You could try adding one more can of tuna but you'd probably need to add more of the wet ingredients for it to hold together.

For the Spinach:
Semi-thaw one bag of chopped spinach. Place contents into a medium skillet, add 1/3 cup water and cover. Let boil until all of spinach has thawed and is warm. Drain excess water. Add 1/4 cup chopped onion and 1 - 2 garlic cloves, chopped. Add a sprinkling of red pepper flakes, a good dose of salt & pepper, italian seasoning or any of your favorites. I added a few drops of rice wine vinegar - this seemed to make the flavors stand out a bit more. And finally add in your choice of cheese (if you can tolerate it). I am just now beginning to try dairy again but parmesan seems to be okay (thank goodness!) If you cannot tolerate cheese don't worry, the spinach still tastes delicious and fresh.

Enjoy!


I had to add this one to showcase the wine, essential for this meal :)

August 2, 2011

Green Smoothie - YUM!

I got home from a good swim and was craving something filling, good for me and oh so delicious! I got out a banana and thought okay this is good but I want something crunchy... I took out a piece of celery and took a bite... yummy and healthy... keep going... SMOOTHIE! I've never just thrown together my own green smoothie before, I've always looked up recipes but they never seemed to suit me. Most suggest only water but it seems to take a lot of the flavor away. Here's what I settled on:

1 banana
1 celery stick (roughly cut into pieces)
handful of raw (shelled) sesame seeds
handful of romaine lettuce or spinach
fresh or frozen mango
1/4 c. vanilla hemp milk (I use Pacific Foods Vanilla Hemp Milk) + a little water

Blend until smooth and enjoy! I was literally scraping it out of the bottom of the glass to get every last drop!


[You can add more liquid if you like... this was pretty thick but I must admit it makes the smoothie stick with you long enough until your next snack ;)]